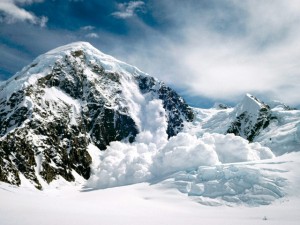
Warm weather skiing and snowboarding can present wet-avalanche dangers. Learn how to spot the warning signs with a simple thermometer.
By Donny Roth
While the spring ski season is renowned for a more stable snowpack, most everyone is aware of the dangers presented by wet-slides. Spring is the time of year that most neophytes choose to enter the realm of ski mountaineering. Even the most novice ski mountaineers know they must start early when the average daily temperatures climb higher, but how do you determine when it’s too late?
“I think we should be off the face by…“
This is a common statement that is often heard during evening planning sessions and discussions along the approach. While you may come to the correct answer with this statement, using time of day to determine whether a slope is dangerous, is not the proper approach. With enough historical information, you may be able to get close using a time estimate, but your watch is not really the critical instrument for making the call to turn around or not.
As an example, I was out skiing great terrain until two o’clock in the afternoon on a sunny day, with temperatures in the fifties. Then, two days later, I didn’t even start up the trail when the temperature reached forty degrees and the sky was completely cloud covered at 3:30AM. So clearly, time is not the determining factor.

Wet-snow avalanches occur when there is enough free water in the snow pack to loosen up the grains in the snow and allow them to slide. This can be difficult to determine, but be sure that it’s not at your watch that you need to be looking at. The tool you need for spotting signs of an avalanche is a high-quality thermometer.
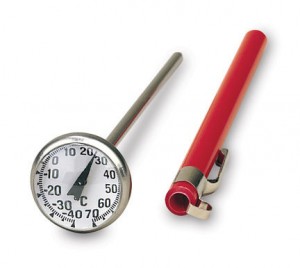
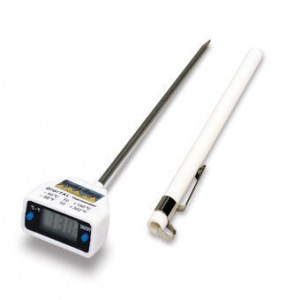
Some good examples of this are from Brooks-Range Mountaineering Equipment. They have two varieties of high-quality thermometers that are made for this application; a Dial-Stem Thermometer (see it on their site), and a Digital Thermometer (see it on their site). Dial-stems allow the user to calibrate the thermometer to ensure accuracy for many years. Digital thermometers are simple to use, and read temperatures to a tenth-of-a-degree.
Use the thermometer to measure the temperature of the air and the snow. While measuring air temperature, you must find a way to suspend the thermometer a meter-and-a-half above the snow. Generally, fastening it to your ski tip, with the tail plunged in the snow, is a good way to accomplish this. If the air temperature is above 0°C (32°F) then there is potential for wet-snow avalanches.
Another factor regarding air temperature is the diurnal freezing cycle. Is it getting below freezing at night? For how long? If the snow didn’t get a good freeze overnight, then it won’t take long for those grains to loosen up once the temperature climbs above freezing in the morning. If it didn’t freeze at all, then you better keep away from hazard areas like steep slopes and cornices.

We all love to ski while it’s warm out. And I have personally made many fantastic, steep descents while the air temperature was above freezing and the snow was warming. The question is, “To what depth is the snow temperature zero degrees?” Take out your thermometer and look for how much snow is isothermic – or consistently zero degrees. If the isothermic layer extends to a good glide layer – like an old crust or a grassy slope at the base – then there is a good potential for wet-slide activity.
So the next time you’re headed out for a classic, spring descent of a corn-covered peak, bring along a good thermometer. Instead of looking at your watch, take a few temperature readings. Sometimes, you’ll have to change your plan earlier than expected. Other times you’ll get to stay out for an extra lap.
Publisher”s Note: Donny Roth is an experienced mountain guide and an representative of Brooks-Range Mountaineering.
One thought on “Backcountry Skiing: How to use a thermometer to spot avalanche danger”